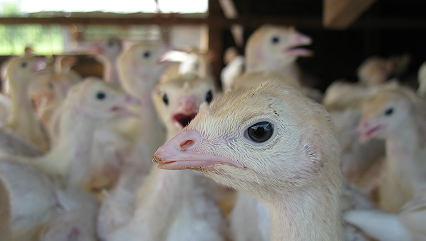
Brooding Turkeys
To ensure a good start for your turkeys, you must pay particular attention during the brooding period as careful management of lighting, water, feed and air is critical for successful brooding.
Light intensity during the brooding period should be between 60 to 80 lux. The brighter the light, the better the reflection or sparkle there is on the water and grit in the feed. This will help attract the poults to the water and the feed. The sooner they start on feed and water, the lower the incidence of starve out and dehydration. Early access to feed and water will also stimulate the development of the gut and promote the absorption of the yolk sac, helping to get poults off to a great start.
Poults should be provided with clean, fresh water that is free from pathogens at all times. It is very important to clean and disinfect water lines and drinkers between crops to ensure there is no bacterial buildup. The addition of satellite drinkers for the first five to seven days helps to provide the poults with easy access to additional water sources. Water lines should be flushed 24 hours prior to placement to ensure water is at room temperature. This will help prevent the poults from becoming chilled. Poults should be provided with easy access to a generous supply of feed. Filling feed lines and hand feeding the pans to keep them very full for the first five to seven days allows easier feed access and reduces the chances that poults won’t be able to find the feed. One tray or box full of supplemental feed per 100 poults is recommended. The feed trays should be topped up with fresh feed daily for the first seven to 10 days.
Providing poults with additional grit on the top of the feed will act as an attractant, as it sparkles under the bright lights in the barn.
Whether you are heating the barn with radiant tube heaters or stove brooders, it is important to pre-heat the barn sufficiently to bring the concrete floor temperature up to the desired temperature of 89⁰F to 92⁰F. This will help to create a comfort zone for the poults of 102⁰F to 104⁰F on the bedding. If the concrete floor is too cold, the birds will become chilled. The cooler concrete will also force the heater to cycle more often, thereby increasing the intensity of the heat. The increased intensity can lead to dehydration of the poults and will raise the C02 level in the barn. All barns are different when it comes to set point. Probe placement and height will greatly affect the temperature that the poults will feel from the heaters. The probe height should be at bird level to ensure the heaters and fans are running to create the appropriate temperature at the bird level, as this is the environment the birds are in. The other factor that needs to be considered during the brooding period is the differential and offset on the control for the heaters. If the heater is set with an offset and differential that is too wide, it will cause the heaters to run for an extended period of time, dehydrating the poults, as well as raising C02 levels, and potentially increasing the number of flips. This will also increase the stress levels of the birds and will hinder the start up. Establishing the set point while brooding should be done by tracking floor temperatures and recording information daily, as well as observing bird behavior. This will make it easier to choose a start temperature for future flocks. High C02 levels will hinder poult performance and therefore should be kept below 2800ppm for an optimum start. Brooding for most operations will consist of cardboard rings around the stoves or tube heaters. By doing this type of brooding, smaller groups of birds are created thereby allowing them to thrive in an area where we have created the perfect environmental conditions. By using these smaller groupings, a low stress environment is created with perfect floor and air temperature close to feed and water. When these rings are created, be sure to count the number of feeders and nipples in each area to ensure that there is a suitable supply for the number of birds in each ring.
Constantly observing your birds and making the necessary environmental adjustments will help you to keep them free from stresses, which will allow the birds to thrive and perform at their optimal potential.
To learn more about Turkey nutrition during every phase of development and how to brood your poults contact a poultry specialist.
How Can You Give Broiler Chicks the Best Start?
How you set up your barn prior to chicks arriving, as well as bird management in the first seven to10 days of life can have a huge impact on the performance of your broiler flock. The goal is to have chicks delivered to the farm as soon as possible post-hatch and fed immediately.
It is a dramatic and stressful change for the chicks as they move from the hatchery environment to the barn environment. Chicks must have access to feed and water immediately as they need to establish normal feeding and drinking behaviors.
If the flock gets to feed quickly and there are no other factors (e.g., nutritional, environmental or disease challenges), you can expect the seven-day body weight to be four or five times greater than the day-old chick weight.
Key Points for Success
- Preheat the barn so that the litter can reach room temperature
- Before the chicks arrive, cover the floor with about 5-10cm of clean, dry litter material
- Ensure the barn reaches the correct temperature and humidity with good air quality at least 24 hours before chicks arrive
- Maintaining the barn around 50% relative humidity will help keep the barn dry throughout the flock
- Provide chicks access to feed and water immediately at placement
- Provide 70g-100g per bird of feed on the floor so that birds can find feed at the floor level in the first days of its life
- Feed system must be flooded
- Activate each nipple by hand so that a droplet of water is visible to the birds
- Lighting should be bright enough that it causes a reflection on the water droplet to help stimulate birds to find the water
- Check and adjust feeders and drinkers regularly
- Watch the birds and use chick behavior as an indicator of comfort
- To learn more about starting broiler chicks off well contact a New-Life Mills Poultry Specialist.